
Raspberry Pi Headless Operation
This will try and explain how to start a Raspberry Pi up without a keyboard, mouse or screen connected to it. Unless you are using your Pi as a Personal Computer or something else that requires direct input from a user the preferred way to access a Pi is to use SSH, VNC or some remote access method.
Older PI operating systems RASPBIAN allowed you to create a wpa_supplicant.conf and an empty file SSH. The Later PI OS seems to have tightened up security adn the only way in these days seems to be to use the Raspberry Pi Imager. So below there are basic instructions. You can probably find better instructions out there but these are my reminder.
Assumptions
- You are using a Windows 10/11 PC.
- You are familiar with Disk imaging.
- You have an SD Card
Raspbian (Buster and backwards) The old way......legacy.
Download Raspbian image of use one you have already
Insert your SDCard into your PC
Use https://sourceforge.net/projects/win32diskimager/ to write the image to an sd card.
Once written to the SD card there is a partition called boot which you can write to (should pop up with a drive letter in windows)
You need to create two files here one called wpa_supplicant.conf and one called SSH (I use notepadd++ to create these because you can change the file type to UNIX)
Create a file wpa_supplicant.conf (make sure the file is unix LF not windows text file)
I think this still works with debian images and some other flavours of linux.
The contents of which would look something like this:
File name wpa_supplicant.conf
ctrl_interface=DIR=/var/run/wpa_supplicant GROUP=netdev
update_config=1
country=uk
network={
ssid=WiFiNamei"
psk="WiFiPassword"
key_mgmt=WPA-PSK
id_str="Home1"
priority=2
}
network={
ssid="WiFiName2"
psk="WiFiPassword2"
key_mgmt=WPA-PSK
id_str="Home2"
priority=3
}
for SSH simply create an empty file called SSH
PI OS (after Buster)
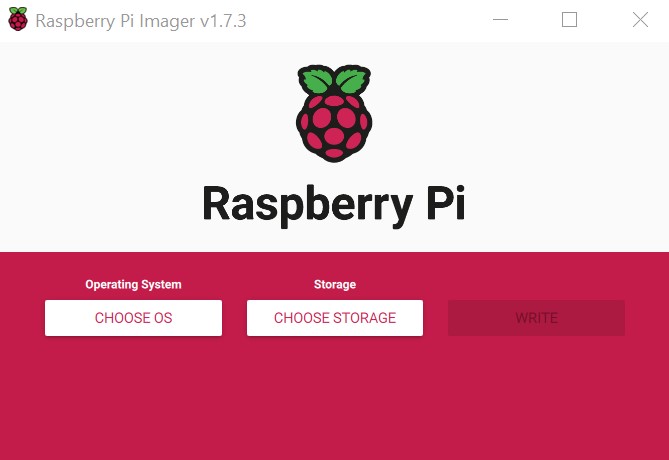
Download the Raspberry Pi Imager from here https://www.raspberrypi.com/software/
Once downloaded run the program
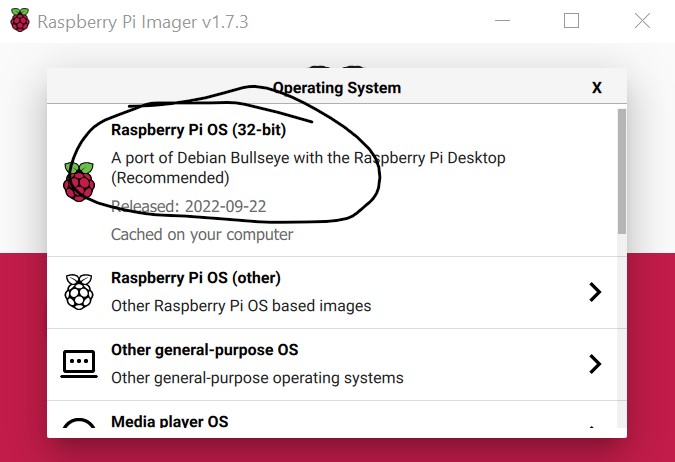
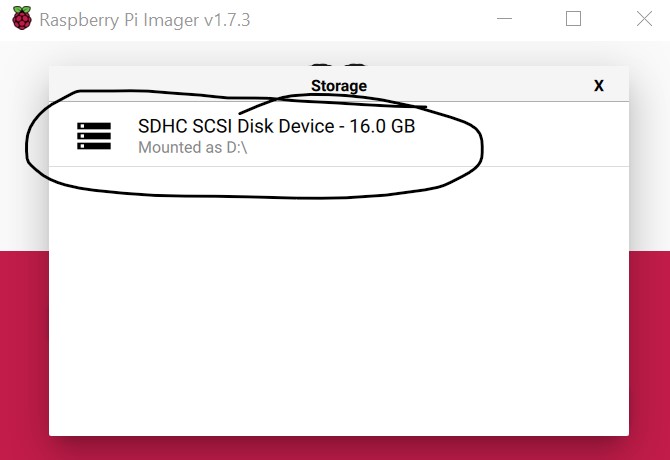
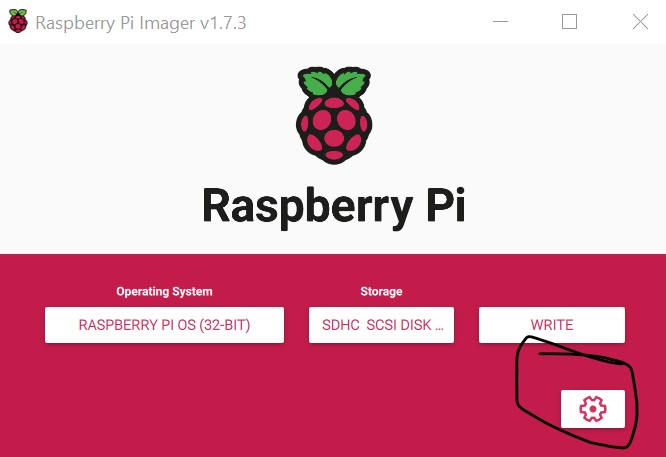
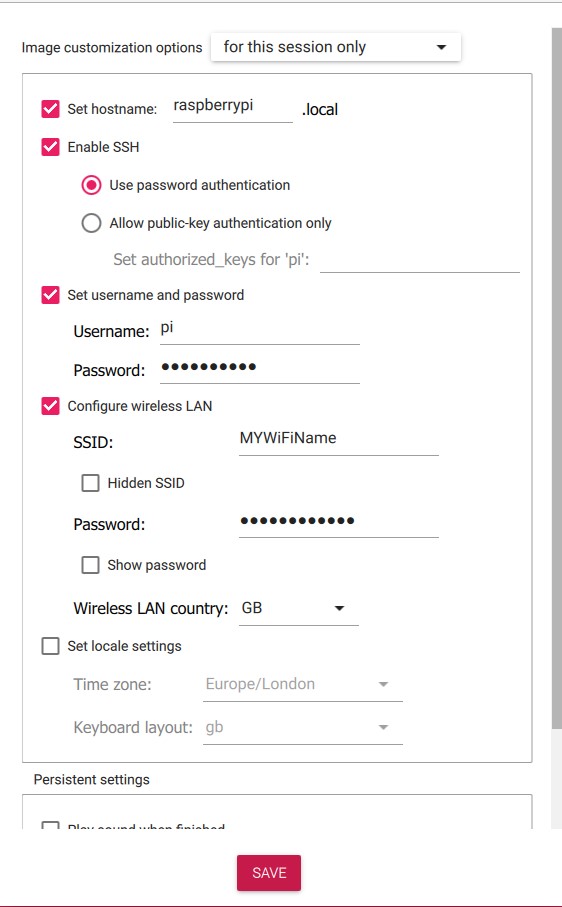
Save the advanced settings and write to the SD card.
Once Complete if you look in the boot folder (visible in windows) a script called firstrun.sh has been created.
This is what runs to set up SSH and the Network.